CareFix Knowledge Hub — Orthopedic Implants & Clinical Insights
Clinical Knowledge Center

Orthopedic Surgical Insights & Clinical Knowledge

Stay updated with surgical technique guides, clinical case analyses, and orthopedic fixation advancements.

CareFix — 16 Years of Orthopedic Innovation
Surgical Excellence

Clinical Innovation & Technique Guides

Integrating clinical research and practical surgical strategies for trauma repair and bone reconstruction.

CareFix Orthopedic Product Portfolio
Global Healthcare Support

Comprehensive Orthopedic Solutions

From external fixators to spinal internal fixation systems — trusted by 365+ hospitals in 32+ countries.

0%

Choosing a Distal Tibia Interlocking Intramedullary Nail is a clinical and procurement decision, not a price comparison alone. The device must suit the fracture pattern, the patient’s anatomy, and the treating team’s established technique. Small details matter. Nail diameter, length, curvature, distal locking options, and targeting instruments can affect compatibility and workflow. A catalog image may look convincing, yet it cannot confirm that the system fits a hospital’s existing equipment.

Before requesting a quote, buyers should define the intended use and confirm technical requirements with orthopedic surgeons and procurement staff. Review product specifications, material information, sterilization status, packaging, and applicable regulatory documentation for the intended market. Ask whether the manufacturer provides clear instructions, instrument support, and reliable supply of compatible components. Compare total costs, including delivery, training, and any required accessories. Check the warranty and clarify how replacement parts are handled. These questions make comparisons more useful than a single unit-price figure.

There is no universal best nail. A low-cost option may create extra work if its targeting system or locking configuration is unfamiliar. On the other hand, added features do not automatically justify a higher price. The checklist in this guide can help buyers ask better questions, but it cannot replace a careful review of the actual system. That limitation is worth remembering. Final selection should follow qualified clinical judgment and the organization’s purchasing and quality procedures.
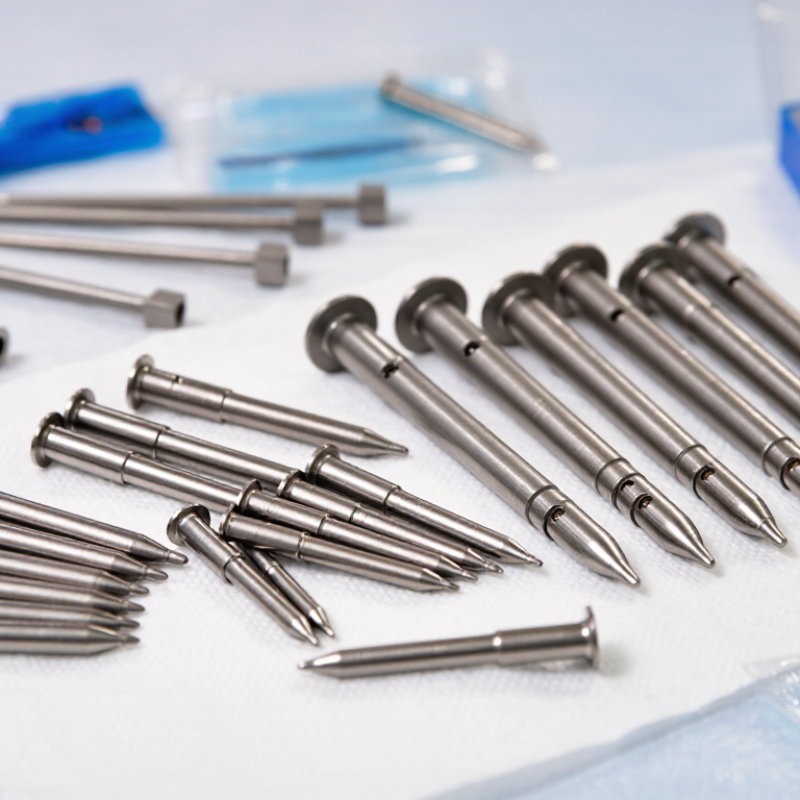
How to Buy a Distal Tibia Interlocking Intramedullary Nail?

Define the Fracture and Distal Segment Length Before Selecting a Nail

Before buying a distal tibia interlocking intramedullary nail, define the fracture pattern and the usable distal segment. Review full-length radiographs, including the ankle, and use CT when the fracture line or joint involvement is unclear. Measure the distance from the most distal fracture line to the planned nail tip. That length affects how many locking screws can engage intact bone. A short distal fragment may need a different fixation plan. Small measurement errors matter.

Tips: Ask the treating orthopaedic surgeon to confirm the measurement and screw positions on imaging. Compare nail length, diameter, curvature, and distal locking options with the patient’s anatomy. Check the required instruments, too.

Do not select a nail by fracture location alone. A simple extra-articular break differs from a fragmented pattern near the plafond, where alignment and secure distal fixation can be harder to achieve. Canal shape, bone quality, and any extension into the ankle joint also influence suitability. There is no single distal-segment measurement that fits every case; the surgeon must judge whether the planned screws can capture stable bone. Product specifications help narrow the choice, but they cannot replace case-specific planning. Even careful templating can be imperfect, so confirm the final plan against the images and the intended surgical technique.

These illustrative measurements show how distal fragment length can vary between fractures; they are not clinical cutoffs or patient data. Measure the fracture level and usable distal segment on calibrated imaging, then check that the chosen nail’s distal locking options can engage the fragment. There is no universal minimum length: nail design, fracture pattern, bone quality, and the treating surgeon’s plan all matter.

Compare Common 8–12 mm Diameters and 240–420 mm Lengths With Measurements

How to Buy a Distal Tibia Interlocking Intramedullary Nail?

Common options include diameters from 8 to 12 mm and lengths from 240 to 420 mm. These ranges are a starting point, not a prescription. The treating surgeon should select dimensions using the patient’s imaging, anatomy, and fracture pattern. Small details matter.

For diameter, review the narrowest part of the medullary canal on appropriate imaging. A nail that is too large may not pass safely; one that is too small may provide a less suitable fit. Canal shape can vary along the tibia, so a single measurement may not tell the whole story. Measure twice. Confirm the sizing method with the device’s technical documentation and the surgical team.

Length affects where the nail and locking screws sit. Use calibrated imaging and assess the distance from the entry point to the intended distal position, while accounting for the fracture and available locking options. A 240 mm nail and a 420 mm nail serve different anatomical needs; the longer choice is not automatically better. I would recheck measurements if images are magnified or positioning is uncertain. Before purchase, verify that the selected diameter and length are available together, and confirm compatibility with the required instruments and locking screws.

Check Distal Fixation: Confirm 2–3 Locking Screw Options and Targeting

When assessing a distal tibia interlocking nail, check whether its distal end offers two or three locking screw options. Multiple screw positions can help the surgeon control rotation and alignment in a short distal segment. Look for options in more than one plane, plus a targeting guide that allows accurate placement. Confirm that the planned screws can avoid the ankle joint and nearby fracture lines using patient imaging. Small details matter.

The UK FixDT randomized trial included 321 adults with displaced distal tibia fractures. It compared intramedullary nailing with plate fixation, not screw counts, so it cannot prove that three distal screws are always better than two (Costa et al., JAMA, 2017). That distinction matters. More holes may offer flexibility, but anatomy, fracture pattern, and safe screw corridors determine what is usable. A third screw is not automatically an improvement.

Tips: Ask to see the nail’s distal-hole layout and targeting guide before purchase. Check screw direction, spacing, and guide compatibility against typical case imaging. If a hole is difficult to target or sits too close to the joint, the extra option may be less useful than it looks. Verify the details with the surgical team.

Verify Implant Materials and ASTM F1264 Testing Documentation

When buying a distal tibia interlocking intramedullary nail, request the exact implant material and supporting records, not just a catalogue description. For titanium alloy or stainless steel, check the stated grade, applicable material specification, and lot traceability. Ask for mill certificates and evidence of manufacturing controls. “Medical grade” alone is not specific enough.

Then review testing against ASTM F1264, the standard covering intramedullary fixation devices and their test methods. Request the full report, including the nail and screw configuration, specimen sizes, test setup, sample count, results, and acceptance criteria. Confirm that fatigue and mechanical testing represent the model you intend to purchase, rather than a similar device. Paperwork can look complete and still leave gaps. Ask the supplier to clarify any missing link between the tested sample and the supplied lot.

This diligence matters in a high-volume clinical area. The GBD 2019 Fracture Collaborators estimated 178 million new fractures worldwide in 2019 (Lancet Healthy Longevity, 2021). That figure is not specific to tibial fractures, but it illustrates the scale of fracture care. Keep the standard edition, material certificates, and test reports together in the procurement file. Recheck them when specifications change. Do not treat a test report as proof of clinical outcomes; it documents defined laboratory performance.

Confirm Sterility, Traceability, Compatibility, and Instrument Availability

When buying a distal tibia interlocking intramedullary nail, verify the sterile barrier before accepting delivery. Check the package seal, expiration date, and sterilization indicator. Do not use a wet, torn, or opened pack. Ask for the lot number, device identification, and documentation linking the supplied nail and locking bolts to their records. The World Health Organization’s 2018 global guidance on medical device traceability highlights identification systems as a way to support tracking through the supply chain.

Compatibility matters in the operating room. Confirm the nail’s diameter, length, curvature, and distal locking options against the patient’s imaging and the surgeon’s plan. Check that the targeting arm, drill sleeves, and insertion handle are compatible with that exact system. A 2018 systematic review in The Lancet Infectious Diseases estimated 11.8 surgical-site infections per 100 surgical patients in low- and middle-income countries. This is not a nail-specific risk estimate, but it reinforces why sterile handling and reliable documentation matter. A checklist helps, though it can still miss a mismatched instrument.

Tips: Request the full instrument set before purchase. Confirm availability of replacement locking bolts and sterile components. Match every label to the order. Keep the packaging record with the patient’s implant documentation. Ask for clarification when a certificate or compatibility detail is unclear.

How to Buy a Distal Tibia Interlocking Intramedullary Nail? - Confirm Sterility, Traceability, Compatibility, and Instrument Availability

Buying Dimension What to Confirm Evidence to Request or Check Practical Acceptance Check
Intended use and regulatory status Confirm that the nail is intended for tibial fracture fixation and that its indications and available configurations suit the planned procedure and applicable local requirements. Current instructions for use (IFU), product labeling, and applicable market authorization or registration information. Check the exact product and configuration against the IFU and the requirements of the country where it will be supplied and used.
Sterility and packaging Establish whether the nail and supplied components are sterile or non-sterile, and whether they are single-use or reusable. Inspect the sterile barrier, seals, and packaging for damage. Labeling, IFU, sterilization information where applicable, and the stated expiration or use-by date for sterile products. Do not use a sterile product if its packaging is damaged, opened, or past its labeled use-by date. Follow the IFU for storage and handling.
Traceability Confirm that the product can be identified and tracked through its catalog or reference number, lot or batch number, and other identifiers shown on the label. Package label and, where applicable, UDI information, delivery documentation, and a lot-specific certificate or record requested by the facility. Ensure the identifiers on the packaging match the purchase and receiving records, and can be recorded in the facility’s implant traceability system.
Nail and screw compatibility Verify that the nail, locking screws, end cap, and any other implant components are specified for use together. Compatibility is system-specific and should not be assumed across manufacturers or product families. IFU, compatibility chart, catalog numbers, and implant component descriptions. Cross-check each planned component’s reference number and size in the current documentation for the exact nail system.
Anatomical and size options Review the available nail diameters and lengths, curvature, and distal locking options. The appropriate configuration depends on patient anatomy, fracture pattern, and surgical planning. Current size range, product drawings or sizing information, and the applicable surgical technique guide. Confirm that the required options are actually available for the selected system; final implant selection belongs to the treating surgical team.
Instrument availability Confirm availability of the system-specific targeting guides, insertion instruments, drill guides, depth gauges, and other instruments required by the technique. Instrument set list, surgical technique guide, loan-set or purchase options, and written confirmation of set availability. Check that the complete required set can be delivered, is compatible with the selected nail, and will be available for the scheduled procedure.
Instrument reprocessing For reusable instruments, confirm validated cleaning, inspection, packaging, and sterilization instructions. Do not assume instruments are supplied sterile. Instrument IFU and reprocessing instructions, including the specified sterilization method and cycle parameters. Confirm that the facility’s equipment and validated processes can meet the instrument instructions before the instruments are used.
Imaging and targeting requirements Review the technique’s requirements for fluoroscopy or other imaging and for locating the intended locking positions. Surgical technique guide and the facility’s planned equipment and imaging setup. Confirm that the required imaging and targeting workflow can be supported in the operating room; follow the technique guide.
Delivery and inventory Check lead time, available sizes, minimum order quantities if applicable, and arrangements for replacement or additional components. Written quotation, itemized product list, stock confirmation, and delivery schedule. Match the quoted reference numbers and quantities to the approved order and confirm delivery before the procedure date.
Documentation and support Ensure current product, safety, and surgical documentation is available in a language and format suitable for the facility. IFU, technique guide, product catalog, safety notices or recall-contact process, and supplier contact details. Keep the relevant documentation accessible to procurement, sterile processing, and the clinical team.

FAQS

What should be measured before choosing a distal tibia nail?

Measure the usable distal segment from the lowest fracture line to the planned nail tip. Small errors matter. Ask the treating surgeon to confirm the measurement on imaging.

Which imaging should be reviewed before purchase?

Review full-length radiographs that include the ankle. Use CT when the fracture line or joint involvement is unclear. Images guide planning, but they do not remove all uncertainty.

Why does the distal fracture segment affect nail selection?

Its length determines how many locking screws can engage intact bone. A short fragment may need another fixation plan. Screw placement must be judged for each case.

What material documentation should be requested?

Request the exact material grade, applicable specification, mill certificates, and lot traceability. “Medical grade” alone is not specific enough. Keep the records together.

What testing records should accompany the nail?

Request the full mechanical test report, including the tested nail and screw configuration, sample count, setup, results, and acceptance criteria. Confirm it represents the intended model. A report is not proof of clinical outcomes.

How should sterile packaging be checked on delivery?

Check the seal, expiration date, and sterilization indicator. Do not use a wet, torn, or opened pack. Match the package label to the order.

Which instruments and components should be confirmed before purchase?

Confirm that the targeting arm, drill sleeves, and insertion handle fit the exact nail system. Check availability of replacement locking bolts and sterile components. A checklist can still miss a mismatch.

What records should be kept for traceability?

Keep the lot number, device identification, certificates, and packaging record with the implant documentation. Recheck records when specifications change. Paperwork can look complete and still have gaps.

Conclusion

Choosing a Distal Tibia Interlocking Intramedullary Nail begins with understanding the fracture pattern and measuring the available distal bone segment. These details help determine whether the nail can be positioned appropriately and whether there is enough bone for secure distal fixation. Compare commonly available diameters, such as 8–12 mm, and lengths, such as 240–420 mm, with the patient’s imaging and measurements rather than selecting by range alone.

Before purchasing, confirm the nail offers two or three distal locking screw options and that the targeting instruments support accurate placement. Review implant material specifications and request documentation for relevant ASTM F1264 testing. Also check sterility status, product traceability, compatibility with the intended instruments and components, and whether the required instruments are available. A careful review of these points helps ensure the selected system matches the fracture, the planned procedure, and the clinical team’s requirements.

Sophia

Sophia

Sophia is a seasoned marketing professional with a deep expertise in the company's range of products and services. With her extensive knowledge and understanding of market trends, she plays a pivotal role in shaping the company's online presence. Sophia regularly updates the company's professional......